First, I needed a nice artwork. I know that Artcam, being a product of Autodesk, is fully compatible with dxf files. And I know that dfx files has been around for decades and a lot of clip arts can be downloaded freely on the internet. My friend google is always there to help, and within a few minutes, I found several free dxf files and I have chosen a butterfly and a complex star pattern.
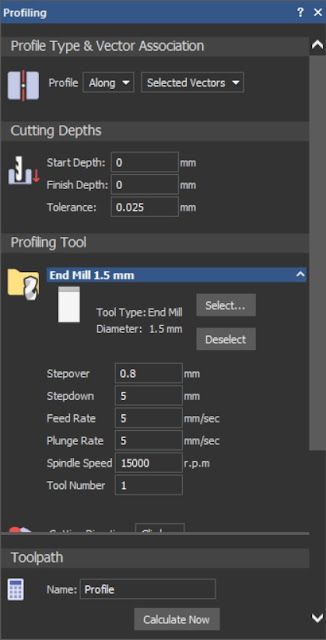
Upon downloading, I immediately opened the dxf files in ArtCam(I assume that readers have already explored ArtCam and have background in cnc). I then created a 2D toolpath using the following settings:

Note that I used very low feed rate and plunge rate. These settings are the most suitable using the Carver Cnc.
Now, I have to use this settings in GRBL Software to get the speed I need:
X-axis Feed rate : 625mm/sec
Y-Axis Feed rate: 625mm/sec
Z-Axis Feed rate: Not important but I used 75mm/sec
Spindle Speed: 4000rpm(to save electricity), but higher rpm is better.
It is also important to note that I used a PCB 1mm diameter drill bit. I have also set Z-Axis depth at -10mm at 75mm/sec feed rate. Since it is just 2d machining, the Z-axis depth is constant.
And I got the following results:


No comments:
Post a Comment